
Solar Inverter Commissioning in India: Complete Guide 2026
Solar inverter commissioning is the critical bridge between installation and optimal performance. For solar EPCs and installation companies operating in India, professional commissioning ensures that every inverter delivers on its efficiency promises, maintains warranty compliance, and operates reliably under the country’s challenging environmental conditions. This comprehensive guide walks you through the complete inverter commissioning India process, from pre-installation safety protocols to final handover documentation.
Whether you’re commissioning on-grid residential systems or large-scale commercial installations, understanding the systematic approach to inverter commissioning protects your investment, satisfies regulatory requirements, and establishes the foundation for decades of reliable solar power generation.
What Is Solar Inverter Commissioning and Why It Matters
Solar inverter commissioning is the systematic process of verifying, testing, and validating that an installed inverter operates according to design specifications and manufacturer standards. Unlike basic installation, which focuses on physical mounting and electrical connections, inverter commissioning India encompasses comprehensive functional testing, safety verification, performance validation, and documentation.

The distinction matters significantly. Installation confirms that components are physically in place. Commissioning proves they work correctly, safely, and efficiently. For solar EPCs, this difference translates directly to client satisfaction, warranty protection, and long-term system performance.
Professional commissioning serves several critical functions in the Indian solar market. First, it validates compliance with BIS (Bureau of Indian Standards) and IEC (International Electrotechnical Commission) standards, which are mandatory for grid-connected solar installations. Second, it activates manufacturer warranties—most premium inverter manufacturers, including those offering 12-year warranties, require documented commissioning as a prerequisite for warranty coverage.
Third, proper commissioning establishes performance baselines. When you document initial efficiency levels, voltage parameters, and operational characteristics during commissioning, you create reference points for future troubleshooting and maintenance. This baseline becomes invaluable when diagnosing performance degradation or investigating warranty claims years after installation.
The impact on system ROI cannot be overstated. A properly commissioned inverter operating at its designed 98% efficiency generates significantly more revenue over its lifespan compared to an improperly configured unit running at 92-94% efficiency. For a 100 kW commercial installation, this efficiency difference translates to thousands of kilowatt-hours annually—and substantial financial losses over the system’s 25-year operational life. Understanding inverter lifespan and financial planning helps EPCs communicate this value to clients.
Pre-Commissioning Preparation and Safety Protocols
Successful inverter commissioning begins before any testing equipment touches the installation. Pre-commissioning preparation establishes the safety framework and verifies site readiness for the commissioning process.
Start with a comprehensive site readiness assessment. Verify that all physical installation work is complete, including panel mounting, cable routing, earthing systems, and inverter mounting. Check that the installation area is clean, free from construction debris, and accessible for testing personnel. For rooftop installations in India, confirm that monsoon protection measures are in place if commissioning occurs during the rainy season.
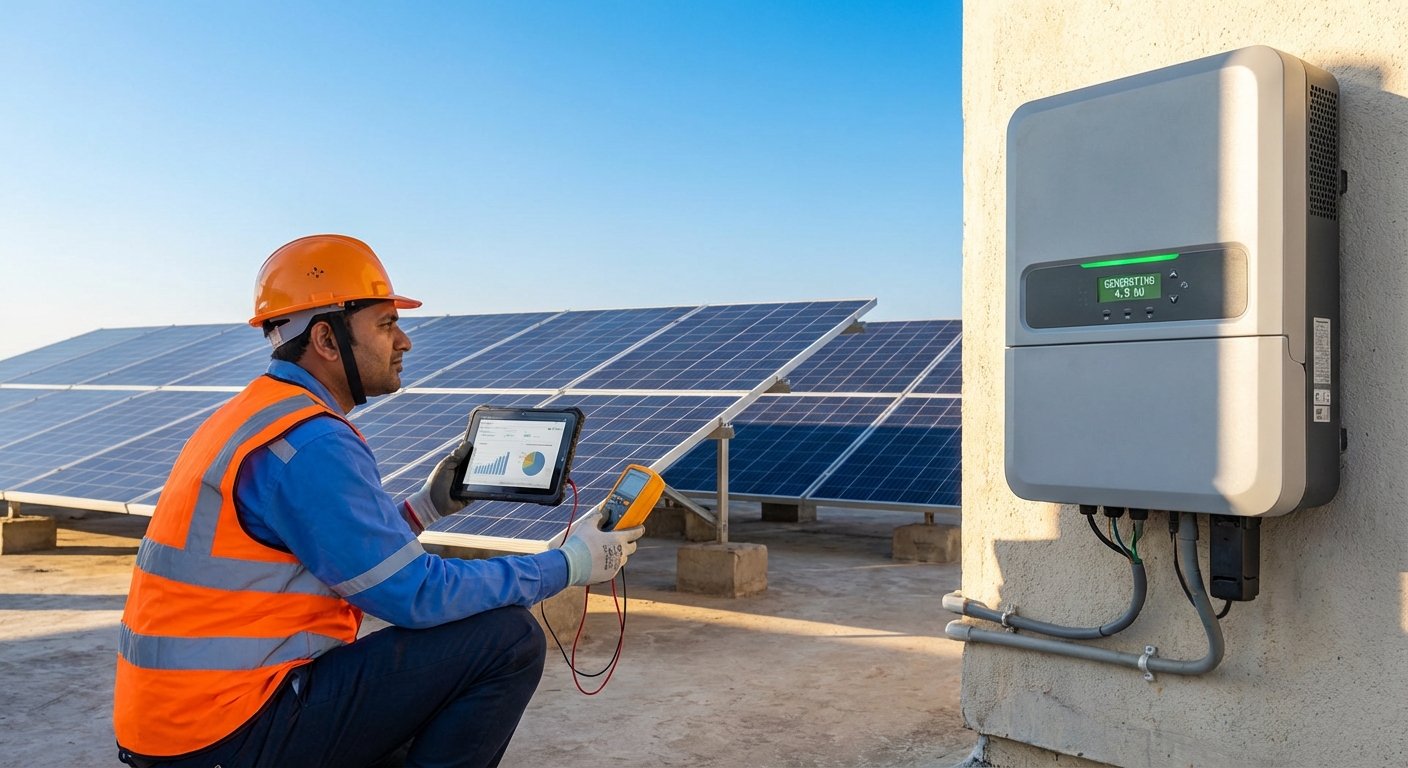
Assemble the required testing equipment before arriving on site. Essential tools for inverter commissioning India include digital multimeters capable of measuring DC voltages up to 1000V, insulation resistance testers (meggers) rated for solar applications, clamp meters for AC current measurement, infrared thermometers for thermal assessment, and grid analyzers for power quality verification. Many professional commissioning teams also carry oscilloscopes for advanced troubleshooting and data loggers for extended monitoring periods.
Safety gear requirements for Indian rooftop conditions extend beyond standard electrical PPE. In addition to insulated gloves, safety glasses, and electrical-rated footwear, commissioning personnel should use fall protection equipment on rooftop installations, sun protection for extended outdoor work during peak hours, and hydration supplies for work in high ambient temperatures. The intense UV exposure and heat on Indian rooftops during summer months create genuine health risks that professional teams must address.
Implement rigorous electrical safety protocols. Before beginning any commissioning work, establish lockout/tagout procedures for the AC grid connection. Verify that DC disconnect switches are accessible and functional. Confirm that all personnel understand emergency shutdown procedures. For installations with battery storage in hybrid systems, implement additional safety measures for DC energy storage hazards.
Review all documentation before commissioning begins. This includes electrical design drawings, inverter datasheets, panel specifications, string calculations, and any site-specific installation notes. Verify that the installed configuration matches the approved design. Discrepancies between design and installation must be resolved before commissioning proceeds—testing an incorrectly configured system wastes time and may damage equipment.
Step-by-Step Inverter Commissioning India Process
The complete commissioning workflow follows a systematic sequence designed to verify each aspect of inverter functionality while maintaining safety throughout the process. Professional inverter commissioning India typically requires 4-6 hours for residential installations and 1-3 days for commercial and industrial systems, depending on system complexity and site conditions.
The process involves three primary stakeholders: the EPC or installation company performing the physical work, the inverter manufacturer providing technical support and warranty activation, and the client who will operate the system. Clear communication among these parties ensures smooth commissioning and proper documentation.
The following sections detail each commissioning step in the sequence it should be performed. This order is intentional—each stage builds on previous verifications, and skipping steps or changing the sequence can lead to missed issues or safety hazards.
1. Physical Installation Verification
Begin commissioning with thorough physical inspection before applying any power to the system. Verify that the inverter is mounted securely according to manufacturer specifications, with appropriate clearances for ventilation. Indian rooftop conditions demand particular attention to mounting integrity—thermal expansion, monsoon winds, and structural movement can compromise poorly secured installations.
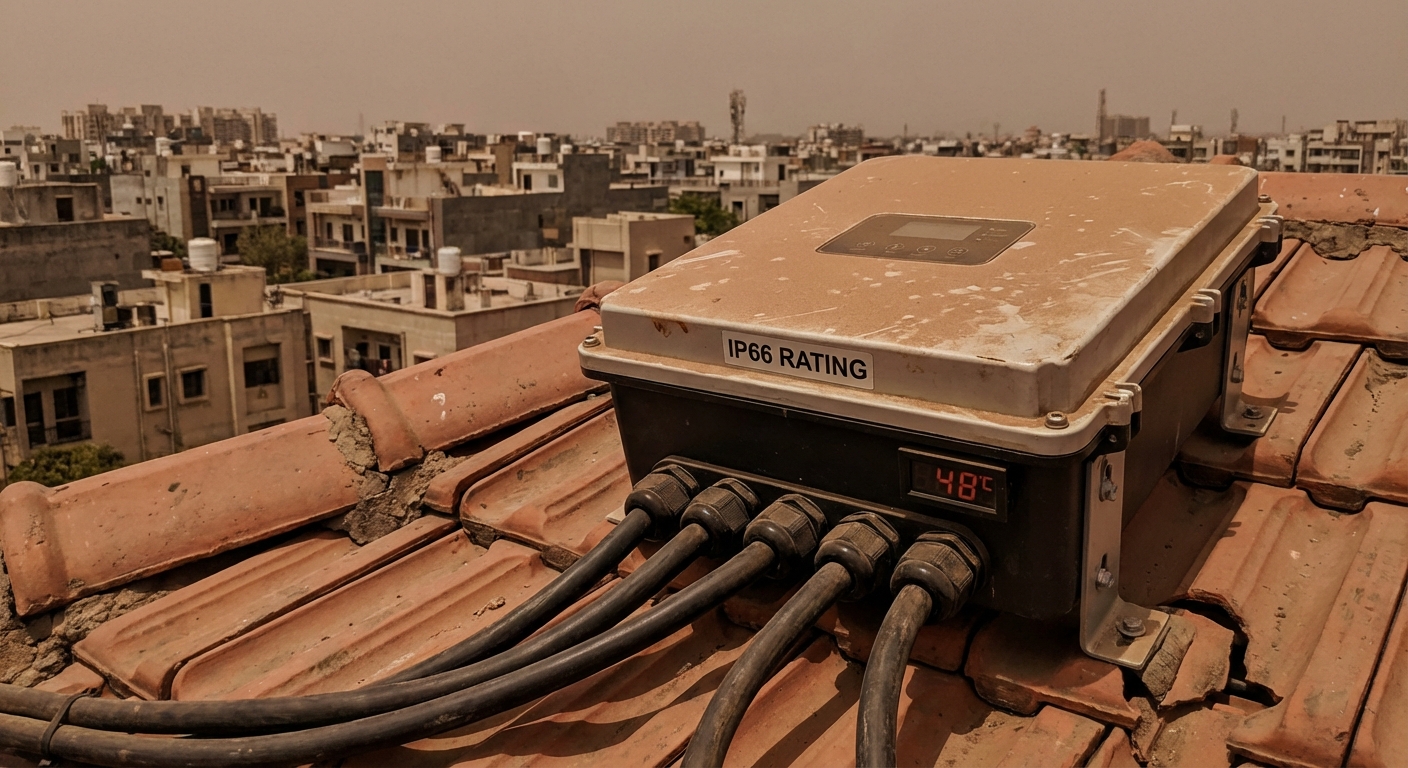
Check that IP66 weather protection ratings are maintained in the actual installation. Examine all cable entry points, ensuring that cable glands are properly tightened and that the inverter enclosure maintains its weather-resistant integrity. Even minor gaps in sealing can allow dust and moisture ingress during monsoon season, leading to premature failure in India’s harsh climate.
Verify clearance and ventilation requirements. Inverters generate significant heat during operation, and inadequate ventilation reduces efficiency and shortens component lifespan. Confirm that the installation provides the manufacturer-specified clearances on all sides and that no obstructions block ventilation openings. For rooftop installations, check that the inverter is not positioned where it will be shaded during peak generation hours, some installers inadvertently place inverters in locations that receive afternoon shade, causing thermal cycling issues.
Inspect all cable routing and terminations. DC cables should be secured properly, protected from UV exposure, and routed to avoid sharp edges or abrasion points. AC cables must meet local electrical codes for sizing and protection. Verify that all terminal connections are tight, loose connections are among the most common causes of commissioning failures and long-term reliability issues.
The grounding and earthing system requires special attention in inverter commissioning India. Measure earth resistance using a ground resistance tester, confirming that the value meets BIS standards (typically less than 5 ohms for solar installations). Verify that all equipment grounding conductors are properly connected and that the grounding system provides a continuous path from the inverter enclosure through the earthing electrode. Poor grounding compromises both safety and surge protection effectiveness.
2. Electrical Pre-Commissioning Tests
With physical installation verified, proceed to electrical testing before energizing the inverter. These pre-commissioning tests identify wiring errors, insulation failures, and configuration issues that could damage equipment or create safety hazards when power is applied.

Start with DC input voltage and polarity verification. Using a digital multimeter, measure the open-circuit voltage from each PV string at the inverter DC terminals. Verify that voltages fall within the inverter’s specified input range and that all strings show similar voltages (typically within 5% of each other). Check polarity carefully, reversed polarity can damage inverter input stages. For modern inverters supporting 750W panels with higher voltage strings, confirm that string voltages do not exceed the inverter’s maximum input rating.
Perform string voltage measurements and imbalance checks. Significant voltage differences between strings indicate potential issues such as shading, module mismatch, or wiring problems. Investigate any string showing more than 10% voltage deviation from others before proceeding with commissioning.
Measure AC output voltage and verify phase sequence for three-phase installations. Confirm that the grid voltage at the point of connection matches the inverter’s configuration settings. Incorrect phase sequence in three-phase systems will prevent proper grid synchronization and must be corrected before the inverter can operate.
Conduct insulation resistance testing using a megger rated for solar applications. This critical test verifies that there are no insulation failures in the DC wiring that could create ground faults or safety hazards. Test between positive DC and ground, negative DC and ground, and positive to negative DC with all DC disconnects open. Acceptable insulation resistance values typically exceed 1 megohm, though specific requirements vary by system voltage and local codes. Low insulation resistance indicates moisture ingress, damaged cables, or installation defects that must be resolved before energizing the system.
Verify continuity and measure grounding resistance. Use a continuity tester to confirm that all equipment grounding conductors provide continuous paths. Measure the resistance of grounding connections, high resistance in grounding paths compromises both safety and the effectiveness of surge protection devices.
Test SPD (surge protection device) functionality on both DC and AC sides. While SPDs are passive devices that only activate during surge events, verify that they are properly connected and that indicator lights (if present) show normal status. Given India’s vulnerability to lightning strikes during monsoon season, functional surge protection is essential for long-term inverter survival. Quality inverters include integrated DC and AC SPDs as standard protection.
3. System Configuration and Parameter Settings
With electrical testing complete, configure the inverter’s operational parameters for Indian grid conditions. This step requires careful attention to local utility requirements and system-specific settings.
Configure grid parameters according to Indian standards. Set voltage and frequency limits to match local utility requirements, typically 230V ±10% for single-phase residential systems and 415V ±10% for three-phase commercial installations, with frequency tolerance of 50Hz ±0.5Hz. These settings determine when the inverter will disconnect from the grid during disturbances, so accuracy is critical for both safety and performance.
For hybrid inverters with battery integration, configure battery parameters including battery type, voltage range, charge/discharge current limits, and depth of discharge settings. Incorrect battery settings can damage battery banks or prevent proper system operation. Verify that battery communication protocols are functioning if the system uses smart battery management.
Set DC oversizing configuration if the installation uses the inverter’s full capability. Modern inverters support up to 100% DC oversizing, allowing installation of PV arrays with peak power ratings up to twice the inverter’s AC output rating. This oversizing improves energy harvest during low-light conditions and extends daily generation periods, but requires proper configuration to prevent inverter overload during peak conditions.
Configure protection settings and thresholds. While default protection settings are appropriate for most installations, some sites require adjustments based on local grid conditions or specific client requirements. Document any changes from default settings in the commissioning report.
Synchronize time and date settings. Accurate timekeeping is essential for data logging, performance monitoring, and time-of-use optimization in commercial installations. Configure the inverter’s internal clock and verify that it maintains accurate time. For inverters with internet connectivity, enable automatic time synchronization via NTP (Network Time Protocol) servers.
4. Monitoring System Setup and Connectivity
Modern inverter commissioning includes comprehensive monitoring system configuration. Advanced monitoring capabilities transform inverters from simple power conversion devices into intelligent system management platforms.
Establish Wi-Fi, 4G, and Bluetooth connectivity according to site conditions and available infrastructure. For installations with reliable Wi-Fi coverage, configure the inverter to connect to the local network. In remote locations or sites without Wi-Fi, activate 4G connectivity using the inverter’s integrated cellular modem. Bluetooth connectivity enables local monitoring and configuration via mobile devices during maintenance visits.
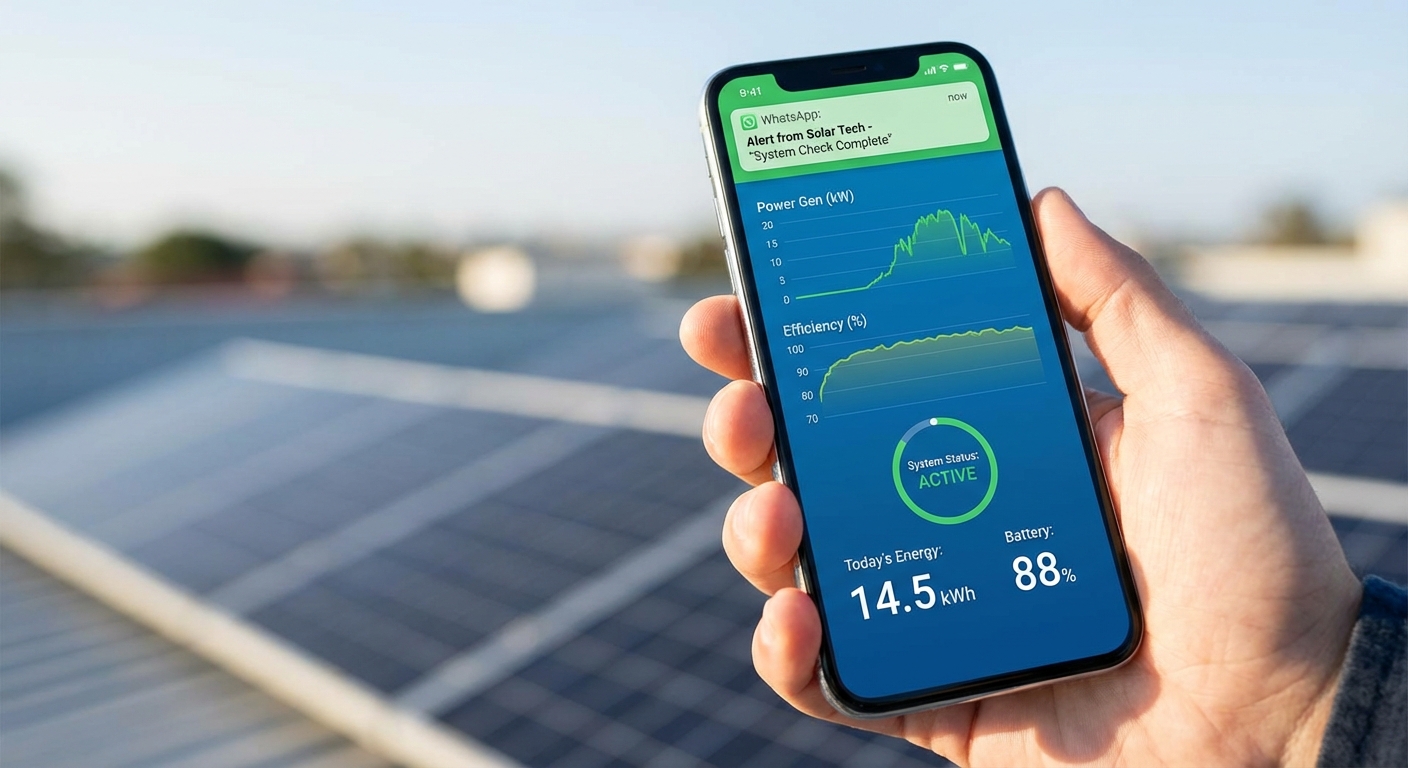
Activate AI-powered WhatsApp monitoring if available. This innovative feature delivers real-time alerts, performance summaries, and system status updates directly to the client’s WhatsApp account, a communication channel that Indian users check regularly. Configure alert thresholds for critical events such as grid failures, low generation, or fault conditions. The convenience of WhatsApp notifications significantly improves client engagement with system monitoring compared to traditional email alerts or dedicated apps that users rarely check.
Install and configure the manufacturer’s mobile app on the client’s smartphone or tablet. Walk through the app interface, demonstrating how to view real-time generation, check historical performance, and access system diagnostics. Verify that all data points display correctly and that the app successfully communicates with the inverter.
Configure alert and notification settings based on client preferences. Some clients want immediate notification of any system event, while others prefer daily summaries with alerts only for critical issues. Customize notification settings to match client expectations and operational requirements.
Verify data logging functionality and confirm connection to India-based servers. Data security and privacy are growing concerns for commercial clients, and inverters that store data on Indian servers address these concerns while ensuring compliance with data localization requirements. Check that the inverter is successfully uploading data logs and that historical data is accessible through the monitoring platform. Proper solar inverter monitoring systems provide the visibility needed for proactive maintenance and performance optimization.
5. Functional Testing and Performance Validation
With configuration complete, proceed to functional testing under actual operating conditions. These tests verify that the inverter performs as designed across its full operational range.
Test the start-up sequence and low-voltage operation. Modern inverters feature low start-up voltage thresholds that enable early morning and late evening generation. Verify that the inverter begins converting power at the specified DC voltage threshold and that it operates stably at low power levels. This test is best performed during early morning or late afternoon when solar irradiance is low.
Verify power conversion efficiency at multiple power levels. While manufacturers specify peak efficiency (typically 98% for quality inverters), efficiency varies across the power range. Measure input DC power and output AC power at 25%, 50%, 75%, and 100% of rated capacity, calculating conversion efficiency at each level. Document these measurements as baseline performance data. Efficiency below manufacturer specifications may indicate configuration issues or equipment defects that require investigation.
Test grid synchronization and anti-islanding protection. The inverter must synchronize with grid voltage and frequency before beginning power export, and it must disconnect immediately if grid power fails (anti-islanding protection). Simulate a grid failure by opening the AC disconnect while the inverter is operating. The inverter should cease power output within the specified time (typically 2 seconds or less). This safety function prevents the inverter from energizing grid lines during utility maintenance, protecting utility workers.
Conduct load testing across different power levels. Observe inverter operation at various output levels throughout the day as solar irradiance changes. Listen for unusual sounds, check for excessive vibration, and monitor operating temperature. Modern inverters operate silently with minimal vibration, any unusual noise may indicate fan problems or internal component issues.
Verify MPPT (Maximum Power Point Tracking) functionality. The inverter’s MPPT algorithms continuously adjust DC operating voltage to extract maximum power from the PV array. Monitor DC voltage and current while observing AC power output. The inverter should track the maximum power point efficiently, adjusting quickly to changing irradiance conditions. Poor MPPT performance results in significant energy losses, particularly during partly cloudy conditions common during monsoon season.
Assess thermal performance under Indian ambient conditions. Measure inverter case temperature during peak generation periods when ambient temperatures are highest. Quality inverters with proper thermal design maintain safe operating temperatures even when ambient temperatures exceed 45°C on Indian rooftops. Excessive temperature may indicate inadequate ventilation, high ambient temperature exposure, or internal cooling system problems. Thermal issues accelerate component aging and reduce inverter lifespan, making this test particularly important for long-term reliability.
6. Protection and Safety Function Testing
The final functional testing phase verifies that all protection and safety systems operate correctly. These tests ensure that the inverter will protect itself, the PV array, and connected equipment under fault conditions.
Test over-voltage and under-voltage protection on both DC and AC sides. Simulate over-voltage conditions (within safe limits) to verify that the inverter disconnects when voltage exceeds configured thresholds. Similarly, verify under-voltage protection by reducing input voltage below operational limits. The inverter should cease operation and display appropriate fault codes.
Verify over-current and short-circuit protection. While you cannot safely create actual short-circuit conditions during commissioning, verify that current limiting functions operate correctly and that the inverter’s protection settings are properly configured. Review the inverter’s self-test results for short-circuit protection circuits.
Test ground fault detection systems. Ground fault detection identifies insulation failures and current leakage to ground, preventing fire hazards and electrical shock risks. Verify that the ground fault detection system is active and properly calibrated. Some advanced inverters provide ground fault resistance measurements that can identify developing insulation problems before they become critical failures.
Check temperature protection and thermal shutdown functions. While you cannot safely force the inverter into thermal shutdown during commissioning, verify that temperature sensors are functioning and that the inverter displays accurate temperature readings. Review the thermal shutdown threshold settings to ensure they match manufacturer specifications.
Test grid disturbance response by observing inverter behavior during natural grid voltage and frequency variations. The inverter should remain connected during minor grid disturbances within configured tolerance ranges, but must disconnect if disturbances exceed safety thresholds. This balance between grid support and protection is critical for reliable operation in areas with unstable grid conditions, a common challenge in many parts of India.
Verify emergency shutdown procedures. Ensure that all personnel understand how to immediately de-energize the system in case of emergency. Test that DC disconnect switches function properly and that opening them immediately stops inverter operation. For systems with battery storage, verify that emergency shutdown procedures address both PV and battery energy sources.
Critical Documentation Requirements for Inverter Commissioning India
Comprehensive documentation transforms commissioning from a testing exercise into a valuable asset for system operation, maintenance, and warranty management. Professional inverter commissioning India generates documentation that serves multiple purposes: warranty activation, performance baseline establishment, regulatory compliance, and future troubleshooting reference.
The commissioning report forms the core documentation deliverable. A complete commissioning report includes site information (location, installation date, system capacity), equipment details (inverter model and serial number, PV module specifications, system configuration), test results from all commissioning procedures, configuration settings, and any deviations from standard procedures or design specifications. The report should be signed by the commissioning technician and, ideally, witnessed by the client or their representative.
Document all test results with measured values and acceptable ranges. For each test performed, record the measured value, the acceptable range or threshold, and pass/fail status. Include measurement equipment details (instrument type, model, calibration date) to establish the credibility of test results. This level of detail proves invaluable when investigating warranty claims or performance issues years after installation.
Activate the digital warranty system and complete warranty registration. Modern inverter manufacturers offer digital warranty platforms that streamline warranty management and claims processing. Complete the warranty registration process during commissioning, uploading required documentation including commissioning reports, installation photos, and equipment serial numbers. The 12-year warranty offered by premium manufacturers requires proper registration and documentation, failure to complete this step may void warranty coverage. Clients can download warranty documentation through the manufacturer’s support portal.
Create as-built drawings and system configuration records. While design drawings show the intended installation, as-built drawings document the actual installed configuration, including any field modifications or deviations from the original design. Record all inverter configuration settings, including grid parameters, protection thresholds, and monitoring settings. This information is essential for future maintenance, troubleshooting, and system modifications.
Prepare a comprehensive handover documentation package for the client. This package should include the commissioning report, warranty registration confirmation, user manuals for all equipment, monitoring system access credentials, emergency contact information, and recommended maintenance schedules. Organize this documentation in a format that the client can easily reference, many EPCs provide both printed binders and digital copies via cloud storage or email.
Obtain and file compliance certificates. BIS and IEC compliance certificates verify that the installed equipment meets Indian regulatory requirements. Ensure that all equipment compliance documentation is included in the handover package and that copies are retained in the EPC’s project files.
Take comprehensive photographic evidence of the installation. Photograph the inverter installation from multiple angles, showing mounting details, cable routing, labeling, and overall installation quality. Capture images of all test equipment displays showing key measurements. Include photos of the complete PV array and any notable site conditions. These photos serve as valuable reference material for future maintenance and provide evidence of installation quality for warranty purposes.
Common Commissioning Challenges in Indian Installations
Solar installations in India face unique environmental and infrastructure challenges that impact the commissioning process. Understanding these common issues and their solutions helps EPCs complete commissioning efficiently and ensures long-term system reliability.
Grid instability and voltage fluctuation present the most frequent commissioning challenge in many Indian locations. Wide voltage swings, frequent momentary outages, and poor power quality can prevent inverters from synchronizing with the grid or cause repeated disconnections during commissioning. When encountering grid stability issues, document the grid conditions using a power quality analyzer. Configure the inverter’s grid tolerance settings to accommodate local conditions while maintaining safety compliance. In extreme cases, recommend grid conditioning equipment or voltage stabilizers to the client. Some areas may require coordination with the local utility to address severe grid quality problems before successful commissioning is possible.
High ambient temperatures and dust exposure challenge both commissioning personnel and equipment. Rooftop temperatures in Indian summers regularly exceed 50°C, creating harsh operating conditions for inverters and testing equipment. Schedule commissioning work during early morning or late afternoon hours when possible to avoid peak heat. Verify that inverter thermal management systems function properly under these extreme conditions. Dust accumulation on inverter cooling vents can impair thermal performance, clean ventilation openings before commissioning and educate clients about the importance of periodic cleaning in dusty environments.
Monsoon season considerations affect commissioning scheduling and procedures. While IP66-rated inverters are designed to withstand heavy rain and moisture exposure, commissioning during active rainfall creates safety hazards and makes accurate testing difficult. Plan commissioning schedules to avoid monsoon season when possible. If monsoon commissioning is unavoidable, implement additional safety measures including waterproof covers for testing equipment, slip-resistant footwear for rooftop work, and postponement of outdoor work during active rainfall. The importance of proper IP66 weather protection becomes immediately apparent during monsoon commissioning, any installation defects that compromise weather sealing will be revealed by the first heavy rain.
Communication connectivity in remote locations can prevent successful monitoring system setup. Many rural and semi-urban installations lack reliable Wi-Fi infrastructure, and cellular coverage may be weak or intermittent. For remote sites, verify cellular signal strength before commissioning and select the appropriate communication technology (4G, 3G, or 2G) based on available coverage. Position external antennas if needed to improve signal reception. In areas with no reliable connectivity, configure the inverter for local data logging with periodic manual data retrieval, or recommend installation of dedicated internet connectivity for monitoring purposes.
Panel wattage compatibility issues arise as module technology advances. Modern high-efficiency panels with 650W to 750W+ power ratings generate higher voltages and currents than older panel generations. Verify that the inverter supports the installed panel specifications, particularly maximum DC voltage and current ratings. String voltage calculations must account for the lowest expected ambient temperature, as PV voltage increases in cold conditions. Inverters designed for modern high-wattage panels include appropriate voltage and current ratings, using older inverters with new high-power panels can lead to overvoltage conditions or current limiting that reduces system performance. Proper inverter selection criteria prevent these compatibility issues.
Troubleshooting common startup failures requires systematic diagnosis. When an inverter fails to start or displays fault codes during commissioning, follow a logical troubleshooting sequence. First, verify that all DC and AC disconnects are closed and that the grid is present. Check that DC voltage is within the inverter’s operating range. Review fault codes in the inverter display or monitoring app, most modern inverters provide detailed diagnostic information. Common startup issues include incorrect grid parameter settings, ground fault detection triggering due to moisture or insulation problems, DC voltage outside operating range, and communication failures preventing startup. Consult the manufacturer’s technical support if standard troubleshooting does not resolve the issue, attempting to bypass safety systems or force operation can damage equipment and void warranties.
Coordination with utility companies for grid connection approval can delay commissioning completion. Many Indian utilities require inspection and approval before allowing grid-connected solar systems to begin operation. Initiate the utility approval process early in the project timeline, submitting required documentation well before the planned commissioning date. Understand local utility requirements and procedures, these vary significantly across different states and distribution companies. Some utilities require witnessed commissioning or specific test procedures. Build utility coordination time into project schedules to avoid delays in final system handover.
Post-Commissioning: Ensuring Long-Term Performance
Successful commissioning marks the beginning of the system’s operational life, not the end of the EPC’s involvement. Post-commissioning activities establish the foundation for long-term performance and client satisfaction.
Implement an initial monitoring period of at least 30 days following commissioning. During this period, track system performance daily, comparing actual generation against expected values based on irradiance conditions. This baseline establishment period identifies any issues that may not have been apparent during commissioning testing. Many performance problems only become evident after days or weeks of operation under varying conditions.
Provide comprehensive client training on monitoring systems and basic troubleshooting. Walk the client through the monitoring app or web portal, explaining how to interpret performance data, recognize normal operation versus fault conditions, and respond to common alerts. Demonstrate basic troubleshooting steps such as checking disconnect switches, verifying grid power, and rebooting communication systems. Educated clients can resolve minor issues independently and provide better information when contacting technical support for complex problems.
Establish scheduled maintenance recommendations based on site conditions and equipment specifications. While modern inverters require minimal maintenance, periodic inspections ensure continued optimal performance. Recommend quarterly visual inspections to check for physical damage, loose connections, or cooling system obstructions. Annual detailed inspections should include cleaning of ventilation systems, verification of grounding integrity, and thermal imaging to identify developing hot spots. In dusty or coastal environments, more frequent cleaning may be necessary to maintain cooling efficiency.
Implement performance benchmarking and degradation tracking systems. Establish expected performance metrics based on commissioning baseline data and system design parameters. Monitor actual performance against these benchmarks, investigating any significant deviations. Track efficiency over time to identify gradual degradation that may indicate developing component issues. Early detection of performance degradation enables proactive maintenance that prevents minor issues from becoming major failures.
Educate clients about warranty claim procedures and support channels. Ensure they understand how to contact technical support, what information to provide when reporting issues, and how warranty claims are processed. Provide contact information for manufacturer support teams and explain the escalation process for urgent issues. Premium manufacturers offer dedicated support services that EPCs and clients can access for technical assistance.
Leverage remote diagnostics capabilities to provide ongoing support efficiently. Modern inverters with advanced monitoring systems enable remote troubleshooting of many issues without site visits. When clients report problems, access the monitoring system to review recent performance data, check fault logs, and verify system configuration. Many issues can be diagnosed and resolved remotely, reducing response time and service costs. For issues requiring on-site intervention, remote diagnostics enable technicians to arrive with the right tools and replacement parts, improving first-time fix rates.
Inverter Commissioning India: Quality Standards and Best Practices
Professional inverter commissioning India adheres to industry best practices that ensure consistent quality and reliable outcomes across all installations. These standards reflect the collective experience of the solar industry and the specific requirements of the Indian market.
Follow established industry best practices for professional commissioning. Organizations such as the Solar Energy Industries Association (SEIA) and the National Renewable Energy Laboratory (NREL) publish commissioning guidelines that provide detailed procedures and quality standards. While these international standards may require adaptation for Indian conditions, they provide a solid foundation for professional commissioning practices. Develop standardized commissioning checklists and procedures for your organization, ensuring that all technicians follow consistent processes regardless of project size or location.
Utilize manufacturer-certified technicians for commissioning whenever possible. Many inverter manufacturers offer technical training and certification programs that ensure technicians understand product-specific features, configuration requirements, and troubleshooting procedures. Certified technicians are more efficient during commissioning and less likely to make configuration errors that impact long-term performance. Some manufacturers require certified technician involvement for warranty activation on commercial installations. Investing in technician training and certification improves commissioning quality and can differentiate your EPC company in competitive markets.
Recognize that quality assurance begins in manufacturing, not just during commissioning. Inverters that undergo rigorous factory testing, such as the 1000+ automated quality tests performed on premium units, arrive at installation sites with higher reliability and fewer defects. This manufacturing quality directly impacts commissioning success rates and long-term field performance. When evaluating solar inverter manufacturers, consider their quality assurance processes as a key selection criterion.
Understand how German-grade component reliability influences commissioning outcomes. Inverters built with premium components from established suppliers demonstrate more consistent performance during commissioning testing and greater long-term reliability. While component quality is not visible during commissioning, it manifests in lower failure rates, more stable operation across temperature extremes, and extended service life. EPCs who consistently install quality equipment experience fewer warranty claims, reduced service costs, and higher client satisfaction.
Ensure compliance with 12-year warranty requirements during commissioning. Extended warranties provide significant value to clients but typically include specific commissioning and documentation requirements. Review warranty terms before commissioning to ensure all requirements are met. Common warranty conditions include commissioning by qualified technicians, complete documentation submission within specified timeframes, proper system configuration, and adherence to installation guidelines. Failure to meet these requirements may void warranty coverage, creating liability for the EPC and disappointment for the client.
Implement continuous improvement and feedback loops in your commissioning processes. After each commissioning project, conduct a brief review to identify what went well and what could be improved. Track common issues across multiple projects to identify systemic problems in installation practices or training gaps. Gather feedback from commissioning technicians about procedure effectiveness and equipment performance. Use this information to refine commissioning checklists, improve technician training, and enhance overall quality. Organizations that systematically learn from experience deliver consistently superior commissioning outcomes.
Frequently Asked Questions About Solar Inverter Commissioning
How long does inverter commissioning take?
Commissioning duration varies by system size and complexity. Residential installations with single-phase inverters typically require 4-6 hours for complete commissioning, including all testing, configuration, and documentation. Commercial and industrial installations with three-phase inverters and more complex configurations may require 1-3 days. Factors that extend commissioning time include difficult site access, grid stability issues requiring extended testing, complex monitoring system setup, and any equipment issues discovered during testing. Plan commissioning schedules with buffer time to accommodate unexpected challenges.
Who should perform commissioning – EPC or manufacturer?
Most commissioning is performed by the EPC or installation company, as they have site access and familiarity with the specific installation. However, manufacturer involvement provides significant value, particularly for large commercial projects or when EPCs are new to a particular inverter model. Many manufacturers offer commissioning support services, either on-site or remotely via video call. Some manufacturers require their certified technicians to witness or perform commissioning on large installations as a warranty condition. The optimal approach often involves EPC technicians performing commissioning with manufacturer technical support available for consultation if issues arise.
What happens if commissioning tests fail?
Test failures during commissioning indicate issues that must be resolved before the system can be handed over to the client. The specific response depends on the nature of the failure. Installation defects such as wiring errors, loose connections, or improper grounding require immediate correction and re-testing. Equipment defects may require component replacement under manufacturer warranty. Configuration errors can typically be corrected and re-tested quickly. Document all test failures and corrective actions in the commissioning report. Do not attempt to bypass safety systems or accept marginal test results, issues identified during commissioning typically worsen over time and may lead to equipment failure or safety hazards.
Is commissioning required for warranty activation?
Most quality inverter manufacturers require documented commissioning as a prerequisite for warranty activation, particularly for extended warranties beyond the standard 5-year coverage. The commissioning report provides evidence that the inverter was properly installed, configured, and tested according to manufacturer specifications. Without this documentation, warranty claims may be denied or require additional investigation. Always review warranty terms before installation to understand specific commissioning and documentation requirements. Complete warranty registration promptly after commissioning, some manufacturers impose time limits for warranty activation.
Can commissioning be done during monsoon season?
Commissioning during monsoon season is possible but requires additional precautions and may need to be scheduled around weather conditions. Avoid commissioning during active rainfall due to safety hazards on wet rooftops and the risk of water damage to testing equipment. Light rain or overcast conditions are generally acceptable for commissioning IP66-rated inverters, though testing accuracy may be affected by low irradiance. Heavy monsoon conditions may prevent meaningful performance testing, as the system cannot generate significant power in very low light. If monsoon commissioning is necessary, focus on electrical testing, configuration, and monitoring setup during poor weather, then schedule performance validation testing for the first clear day. The advantage of monsoon commissioning is that it provides an immediate real-world test of weather protection, any installation defects that compromise IP66 sealing will be quickly revealed.
What are the costs associated with professional commissioning?
Commissioning costs vary based on system size, location, and service provider. For residential installations, commissioning is typically included in the overall installation price, representing approximately 3-5% of total project cost. Commercial installations may have separate commissioning line items, particularly if manufacturer involvement or specialized testing is required. The cost of professional commissioning is a valuable investment that ensures optimal system performance, warranty compliance, and long-term reliability. The financial impact of poor commissioning, reduced efficiency, warranty voids, premature failures, far exceeds the cost of proper commissioning. EPCs should view commissioning as an essential quality assurance step rather than an optional expense.
Professional Inverter Commissioning India: Your Path to Reliable Solar Performance
Comprehensive inverter commissioning India transforms solar installations from collections of components into optimized, reliable power generation systems. For EPCs and installation companies, professional commissioning protects your reputation, ensures client satisfaction, and establishes the foundation for decades of trouble-free operation.
The systematic approach outlined in this guide, from pre-commissioning safety protocols through post-commissioning performance monitoring, reflects industry best practices adapted for India’s unique environmental and infrastructure challenges. By following these procedures, documenting results thoroughly, and maintaining quality standards throughout the process, you deliver installations that meet design specifications, comply with warranty requirements, and generate maximum value for your clients.
Success in inverter commissioning India requires the right combination of skilled technicians, quality equipment, and systematic processes. Inverters built with German-grade components, subjected to rigorous factory testing, and backed by comprehensive warranties provide the reliability foundation that makes commissioning efficient and outcomes predictable. When you combine quality equipment with professional commissioning practices, you create solar installations that deliver on their performance promises year after year.
Ready to elevate your solar installations with professional-grade inverters designed for the Indian market? Qbits Energy manufactures next-generation solar inverters with AI-powered monitoring, 12-year warranties, and IP66 weather protection engineered specifically for India’s challenging conditions. Our on-grid and hybrid inverters support modern 750W+ panels, deliver 98% efficiency, and include integrated surge protection for long-term reliability. Explore our complete product range designed for residential and commercial installations, or contact our technical team to discuss how Qbits inverters can enhance your next solar project with superior performance and comprehensive support.
For EPCs and distributors seeking a reliable inverter partner with strong technical support and attractive channel programs, explore partnership opportunities with Qbits Energy. Our commitment to quality, innovation, and customer success makes us the ideal partner for growing your solar business in India’s expanding renewable energy market.
This blog post was written using thestacc.com